Build a Computer

How many people can tell what a satisfying experience it is building your own computer? If the answer is not many, then why not become one of them and see what all the fuss is about. Building a computer is a relatively simple process and it can be done without any real training or skill. Below describes how to build a "Bare Bones" computer system, this is just the box, and we have illustrated the fundamental steps involved.
The Tools
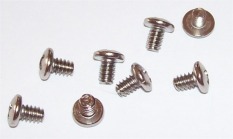
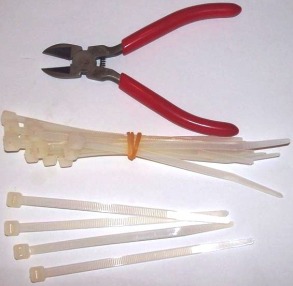
To begin all you need is a little time, space and simple tools like a “Phillips Head” screw driver and pliers. You may also need a torch depending on the light in your working environment, and small cutters or even scissors to cut the ends of plastic zip ties which you will also need.
You can purchase a “computer repair kit” from many electrical stores that have all the necessary tools required to build your computer. Below is an example of a simple kit.
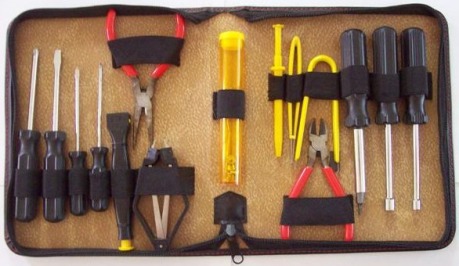
Basic Computer Repair kit
A small torch is handy for working in dark areas and you may find it easier to use one of the “strap-on” brands that fit to your head. This provides “hands-free” lighting so you have two good hands to work with. Below is an example of one we use.
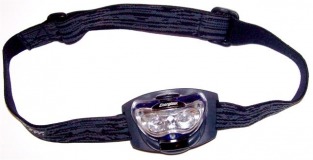
Strap-on Headlamp
As with anything electronic you must pay particular attention to “ESD” or electrostatic discharge, this is the static electricity generated by our bodies. Computer components are very susceptible to it and you can quite easily zap these parts before you begin. I recommend you first read our DIY Project page before you start setting up for you build. Here you will see that we also recommend you use an antistatic strap. Pictured below is an antistatic wrist strap.
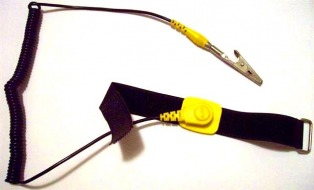
Antistatic Strap
Once you have these items, to begin working try and select an area that is not on carpet, if possible a dry elevated area like a bench or table is well suited for this task.
So no doubt you may want to know what equipment is required in order to build your own computer, sure we have listed some vital tools but what about parts.
Obviously you will need parts before you can build, so where do we get them? This varies depending on where you live. There are two ways of obtaining parts, the first is via the internet (sometimes cheaper), so do your research because there are many online wholesale stores happy to accommodate your purchases. You can also check out your local computer shop, they might discourage you from building your own, or they might help you out and offer some advice, the shop offering “free” advice is the one I would choose. !
Another important consideration with your parts concerns compatibility, you obviously need compatible parts and a good place to start is with the motherboard.
Design your computer from the inside out and in doing so make everything compatible in that same order. So long as your CPU and RAM are compatible, and the board fits the case, the rest generally falls into place. Motherboard manufacturers detail compatibility on their websites.
I would also recommend a "Google" search regarding your motherboard and compatibility.

Google Search
The parts required for a computer system are easily obtainable and very easy to put together. Listed below are the basic components needed for a basic tower or “box”. The computer we will build here is of compatible parts and is generic, meaning it is not of a proprietary nature, (belonging to a specific manufacture).
Components should fit together like a big mechano set. Sometimes they might prove a tight fit and require a little pressure to make them go together. Even though manufacturers try and conform to specific sizes and standards, you may still have to make some minor adjustments.
Components should fit together like a big mechano set. Sometimes they might prove a tight fit and require a little pressure to make them go together. Even though manufacturers try and conform to specific sizes and standards, you may still have to make some minor adjustments.
The parts for a "Bare Bones" Computer System
|
System Case and PSU Motherboard CPU or Processor Ram or Memory Hard Drive and DVD Drive Operating System or "OS" |
 |
System Case : The box or tower that houses the components. When choosing a case try and select one that comes preinstalled with a PSU (Power Supply Unit). This part supplies power to the rest of the computer, some cases are sold without them. You can also choose your own but it is often cheaper to purchase a case with one installed.

Midi Tower System Case
Motherboard: Also known as "Mobo" for short, it is the biggest chipset in the computer that all the internal components attach to. These come in standard sizes and the one detailed below is a mico ATX, this size allocation is also know as "form factor". This particular motherboard also has oboard video and audio, so we do not need a video or sound card.
ATX Motherboard
CPU: (Central Processing Unit), the bit that does all the thinking, the computer's brain. !

CPU and Heatsink
RAM: (Random Access Memory), this is the computer's memory, (the more the better)!
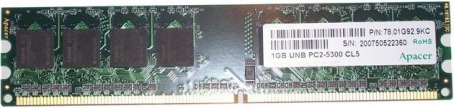
DRR2 RAM
HDD: (Hard Disc Drive) the storage device that stores all of your information, like a library.
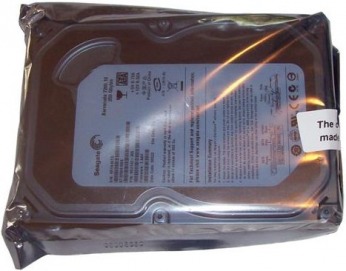
Hard Disc Drive
DVD Drive: This is used for burning and installing programs and playing DVD’s, CD's, etc.
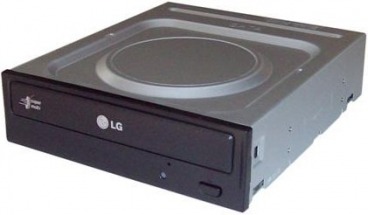
DVD/RW Drive
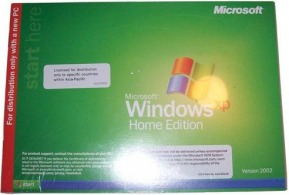
Operating System: (OS) basically this is Windows. It can be Windows Vista, 7 or XP, etc.

Windows XP
|
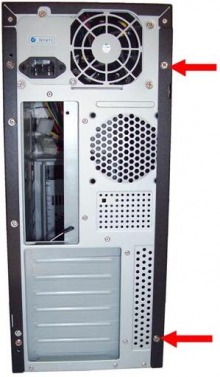 Unscrew screws as above |
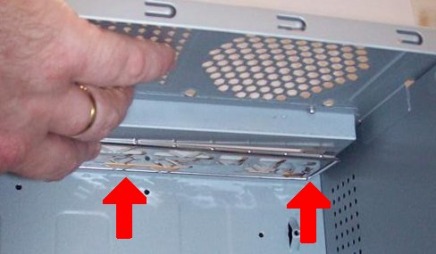
Now simply lay the case left side down so we can remove the right side case panel. Just slide it back and guide it with your other hand, as depicted below.

Slide cover back
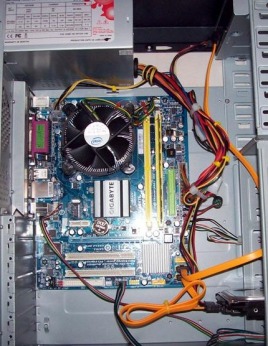
Now you have the case open and with some extra joys inside, the power cord speaks for itself but the little bag of screws is less obvious. Take these out and put them aside, place them in a cup or container for later use. Now it’s about prepping the case for motherboard installation.
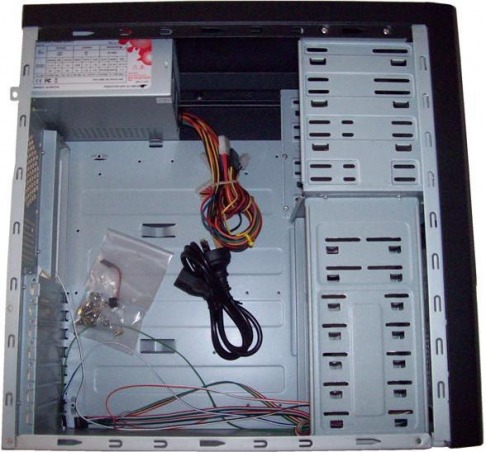
Empty case before component installation
The next thing we need to do is check the size and shape or “form factor” of the motherboard, making sure it will fit into our case. If the case is an ATX case and you have and ATX board, then it should fit. So ensure your system case will take the motherboard you intend to use. Now we need to check where the "standoff" or riser screws will go to accommodate our motherboard.
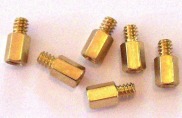
Standoff Screws
The “stand-off” screws are like pylons that keep the motherboard from resting on the back plane of the case. They correctly position the motherboard, now you will need to screw these in. They are positioned in different places depending on what motherboard and system case you have, the best thing to do, is identify where they need to go before you insert the board. Because we are building a system with a “Micro ATX” form factor, these screw locations are set in standard positions. This varies according to the board and case you have.
Below details screw locations of a micro ATX motherboard:
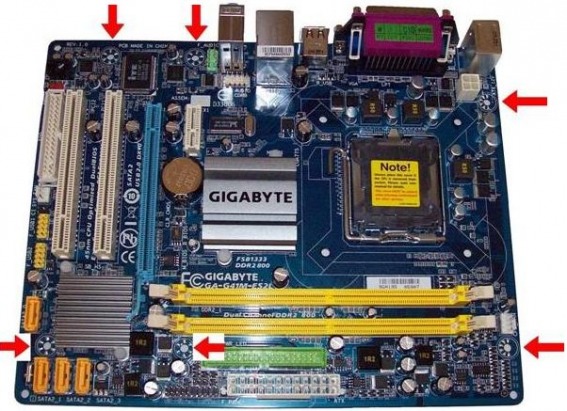 ATX Motherboard Screw Placement |
You can usually tighten the standoffs by hand, or use a "Hex" female driver to secure them. Just be careful not to over tighten, too much tension can thread or see them stuck in the backplane.
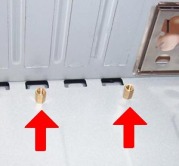 Standoff Screws |
The next thing we need to do is affix our I/O plate, this basically forms a barrier between our computer and the outside world. The I/O stands for imput/output.
Below is an I/O plate for an ATX case.
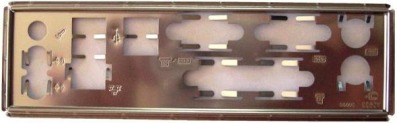
I/O Plate
Position your I/O plate so the leading edges are facing outward, make sure you have it the correct way up, look at the output side of your motherboard so you can orientate it correctly.
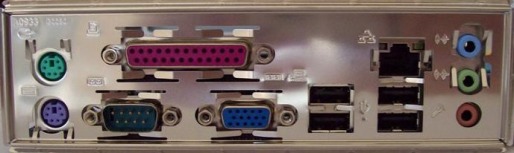
I/O Plate Orientation
You can see how it accommodates the external connectors of the motherboard, once situated within the case this becomes our primary source of interconnectivity.
As a good rule of thumb, always orientate the plate so the ports for the mouse and keyboard are towards the top of your case. Smooth edge facing out and metal spines facing in.
Mouse and Keyboard Ports towards top of case
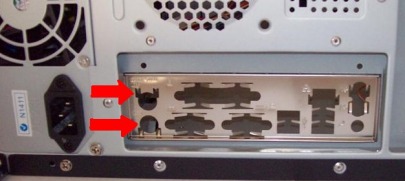
Assuming you are happy with its orientation, insert it into the case, beware of sharp edges. !!
Insert the I/O Plate
Now that the case is “prepped” for the board, we now have to prepare the motherboard to be installed in the case. This firstly involves attaching the CPU to the motherboard. Remember to avoid ESD by touching something metal to discharge yourself before you touch the board or any of its components. Simply putting your hand on the case should do it, or you could ware your antistatic strap.
Installing the CPU
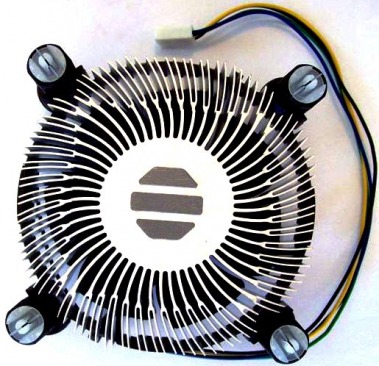
You will now need to get your CPU and cooling fan “heatsink” that looks like this:
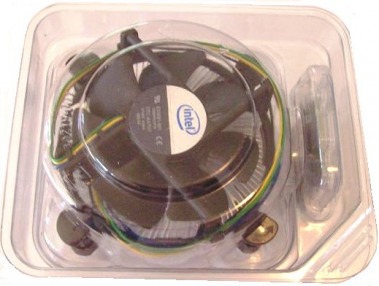
CPU and Heatsink
|
Once out of its packaging place the cooler aside, be very careful not to touch the underside of the cooler, it has a small amount of thermal grease or compound said to be highly carcinogenic. !!
|
 |
The little square chip you are now left with is actually the CPU, this is the computers brain, the part that does all the thinking. Place this down on something clean and dry, you want to avoid contaminating the underside of your CPU. Now flip it over so you have the silver side facing up. If you look closely you will notice a small gold triangle at the top left as shown below. You will also notice two notches either side of your CPU. These help us orient the CPU correctly.
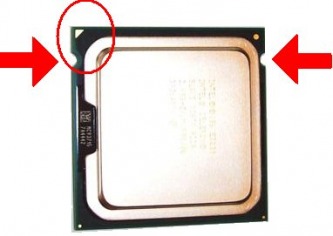
CPU Gold Triangle at top left
Below details the CPU slot and where these notches and traingle match up. The slot or "socket" is keyed so you can only orient the CPU one way. Attaching the CPU to the motherboard is probably the most difficult part of the build. When we have the CPU socket open look carefully and you will see a pin missing in the top left of the socket, this is where you match up the gold triangle on the CPU. The two notches also orientate the CPU in the socket. You must place the CPU in the socket with the silver side facing up.
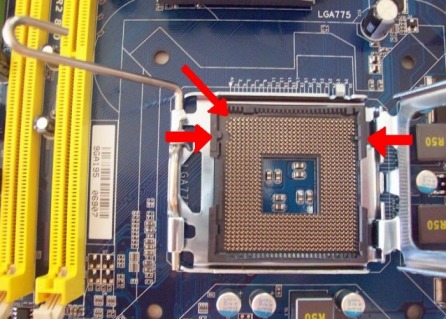
Socket 775 Keyed for CPU alignment
This particular slot pictured above is an LGA 775 ZIF socket.
Translated into English LGA stands for “land grid array”, which implies 775 tiny pins that are aligned under the CPU in a grid. It is these pins that allow the CPU to talk to the rest of the computer.
The “ZIF” part stands for “zero insertion force”, this means you can place the CPU in the socket with no damage to these tiny pins, you do not require any pressure (insertion force) to position the CPU.
Let’s have a look at what is involved in seating the CPU into the motherboard socket.
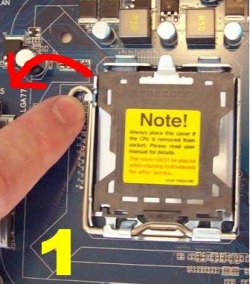
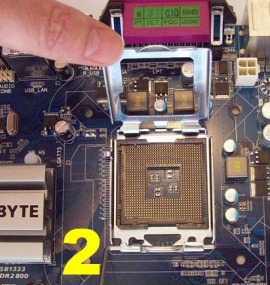
I have detailed this process in four simple steps:
1) Remove the plastic cover and lever out the load lever and pull it backwards
2) Open the load Plate
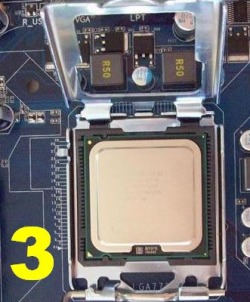
3) Gently lower the CPU into the socket (silver side up).
4) Replace the load plate and lever (this will require some pressure).
2) Open the load Plate
3) Gently lower the CPU into the socket (silver side up).
4) Replace the load plate and lever (this will require some pressure).
 |
 |
 |
 |
Once the CPU is seated in place we can begin attaching the CPU cooler.
This is perhaps the most difficult and frustrating part since we need to place this “Lunar landing module” over the CPU, and then push-in snap-in fasteners into holes around the CPU.
These holes are located on the motherboard as depicted below:
 Holes for CPU Heatsink Placement |
 Underside of Heatsink |
As mentioned previously sometimes things don’t always fit as nice as we would like and you may need to use some force. Fitting CPU heatsinks are absolutely no exception and this is why we do this with the motherboard still outside the case.
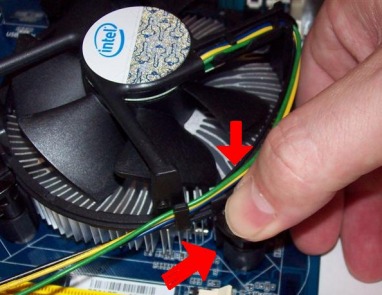
Another thing worth considering before you fit the heatsink is the location of the CPU fan pinouts, these provide power to your cooling fan. It is best to try and orient the heatsink so the power cables are as close as possible to the pinouts, this way you also reduce the risk of these cables getting caught in the cooling fan.
CPU Fan pinouts
When you are happy with the orientation of your CPU heatsink, begin gently pushing each fastener in each hole, I usually start closest to the center of the board and work my way out. This way if one becomes stuck (and they nearly always do)!! You will find it easier to fix it last. Beware that it does sometimes require some pressure and you may find it easiest to place one hand under the board and push with your other thumb. You should hear a click as they go in.
 Push Heatsink Support Pins into Board, sometimes requires pressure !! |
 CPU Heatsink Pins After you have seated all four fasteners, check the underside of the board, here you should see them poking through, if they are not then you may have to reseat them.
|
Next comes some “zip tying” and for this we need two things, firstly some zip ties and secondly some cutters as shown below. You use the cutters to cut off excess tie.
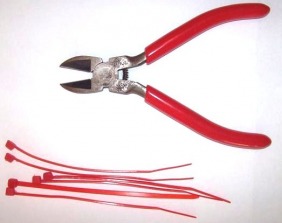 Cutters and Zip Ties |
 Cut off any excess tie |
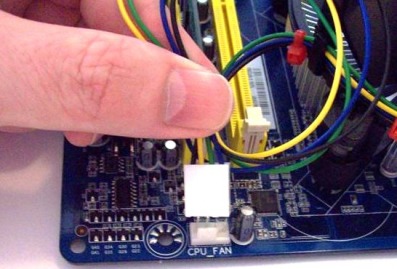
We use these to secure loose cables inside the computer, the last thing you want is a part of the computer overheating because some stray cable got caught in a cooling fan. Bundle and zip tie the cables for the CPU heatsink and attach it to "CPU FAN" pinout.
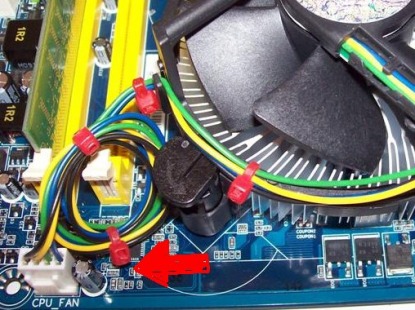
CPU Fan Cable Zip Tied and Secure
Installing the RAM
Now with the processor in place its time to add the RAM to the board, this is a relatively simple process and begins by orientating the ram so it matches the slot it will be seated in. With desktop ram one side will be slightly longer than the other, just make sure you place it in the correct position.
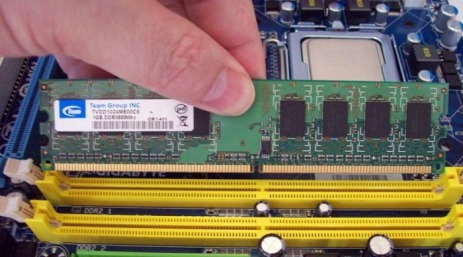
Align the DIMM with the Slot
There are small retaining clips (circled in red) at each end of the ram slot, pull these back to allow room for the ram. Once you have oriented your ram correctly, gently push it in the slot, sometimes it can take a bit of pressure. You will hear the retention clips snap into locking position when the DIMM module is seated correctly.
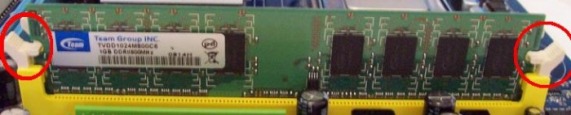
DIMM Seated with Retention Clips Inplace
DIMM stands for “Dual Inline Memory Module” and you should make sure that your motherboard supports the ram you will be installing.
To find out more about ram see: Upgrading Ram.
Installing the Motherboard
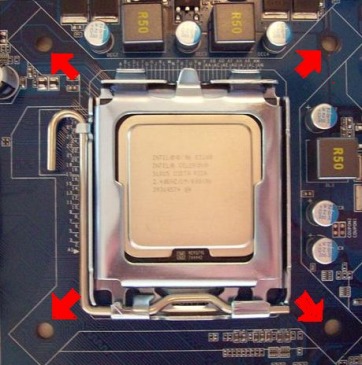
Now the motherboard is ready to be installed in the case, again sometimes things won’t always fit as we would like, and you may find that after a little pushing and shoving it will eventually fit. Also never pick-up the board by the CPU heatsink or the I/O ports.
Be careful not to damage your board and pay special attention to where the imput/output ports at the rear go through the I/O plate. You also need to position the board so the screw holes align with the standoff screws as shown below.
Be careful not to damage your board and pay special attention to where the imput/output ports at the rear go through the I/O plate. You also need to position the board so the screw holes align with the standoff screws as shown below.
 Align Screw holes with Standoffs Once the board is in, this is what you should see, now it's about securing the board to the case.
|
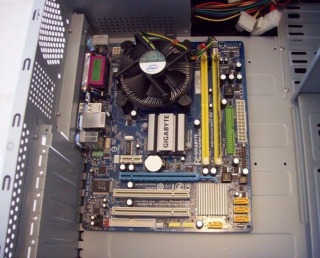 Motherboard Installation |
You secure the board using other case screws designed as “male” screws that fit into the “female” end of our standoff screws, do not over tighten them. These are the screws used to secure the motherboard.
 Motherboard Screws Some parts of the board are difficult to get at and you may require pliers for screw placement. As a rule I usually start at the back of the board and work forward.
|
 |
Installing the Drives
|
Before installing any drives we will have to stand the case upright, remove the case panel screws and then remove the left side cover. It is often a good idea to keep these screws in a cup or container because we will use them again later. It is amazing how many people loose these, just so happens that I am one of them !! |
 Remove Left Case Panel |
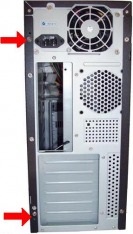
Now we need to install our drives, let's begin with the DVD Drive. The DVD drive is usually installed from the front of the computer, sometimes you may have a face plate that hides the drive. Some of these have a flapper doors that allow the CD caddy to extend and retract. Other times you may just have a blank face plate, either way you need to remove them.
These are fairly easy to remove, for a blank face plate, just pop it out from the back using a screw driver. For the door type, if you have a repair kit, use your “chip puller” to edge in the side and free the flexible retaining bracket. From here simply pull it out, you can replace the "flapper door type" after your drive is installed or leave it. I would probably leave it as they can cause problems later on, they are really more aesthetic rather than functionional.
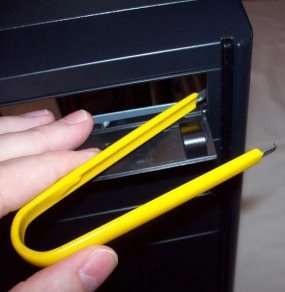
Use a Chip Puller to Extract Face Plate
Assuming the path is clear you can front-load your drive, simply align it with the case so it runs flush with the front, again it may be a tight fit so a little shoving from side to side may help.
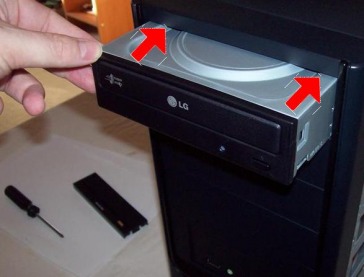
DVD Drive Installation
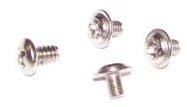 Drive Screws Secure the drive with screws on both sides, fasten these firm but do not over tighten.
|
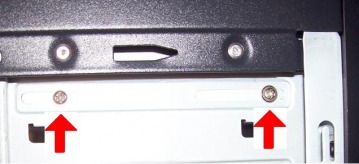 Secure DVD Drive with Screws |
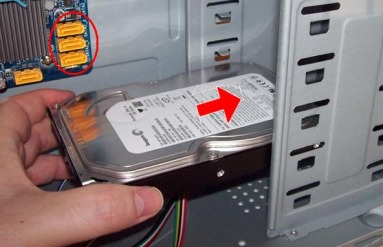
The next drive to install is our HDD, and this one should be so placed, that it is as close as possible to the “SATA” terminals on our motherboard (circled in red on the right) and also not to far from its power cables. The reasons for this are for wiring the system, it is often best to compromise between these two for position and placement.
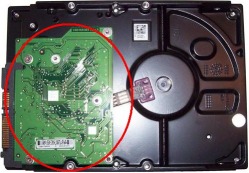 Circuit Board on HDD
Be very careful not to touch the circuit board on the underside of the drive to avoid ESD.
|
 HDD Installation |
|
Once your HDD is in place, secure it on both sides with drive screws, again do not over tighten them, there is nothing worse than trying to remove it later and the screws are threaded. |
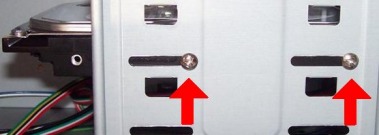 Secure HDD with Screws |
Wiring the Computer
You would have seen at the beginning of this tutorial we mentioned the case and PSU.
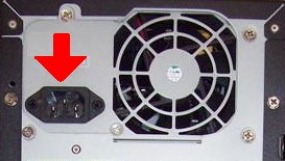
The PSU or “power supply unit” is the part that has a dozen or so bundled wires leading out from it. These are the wires we need to plug in to our drives and motherboard. The rear of the PSU is where you plug in your 240Volt power cord.
The PSU or “power supply unit” is the part that has a dozen or so bundled wires leading out from it. These are the wires we need to plug in to our drives and motherboard. The rear of the PSU is where you plug in your 240Volt power cord.
 PSU Installed in System Case |
 Rear of PSU |
Before we begin explaining how to wire your system, I should mention an important fact about the PSU, this is about the wattage or “Watts” for short. When ordering your system case, choose one that has ample power for your intended system.
If possible choose a case that includes a PSU that provides at least 60% of its maximum power to the system with everything running. So if your PSU was rated at 1000 watts (1000w) and you had absolutely every part of the computer working at once, you only want it to use 600 watts of power. You want at least 40% overhead or surpless power.
This helps reduce any potential power problems and also allows for expansion should you choose to upgrade your system. The wattage of a PSU is usually labled on its right side.
Wiring your system is perhaps the second most frustrating part of a computer build, each wire has a connector at one end designed to fit their respective pinouts and sockets. Most are “keyed” to fit one way only, while others are not and they may prove a little bothersome.
We will begin wiring the motherboard first, the biggest power connector is the ATX power connector pictured below. You need to plug thisin its keyed socket as shown on the right.
We will begin wiring the motherboard first, the biggest power connector is the ATX power connector pictured below. You need to plug thisin its keyed socket as shown on the right.
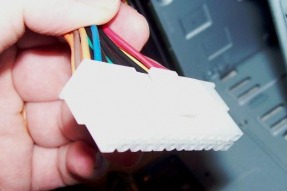 ATX Connector |
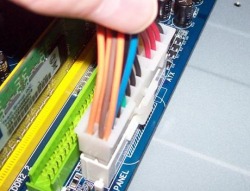 Plug in ATX Connector |
The next connector supplies power to the CPU and has yellow and black wires with a four-pronged connector. It is keyed to fit only one way, plug this in the socket next to the CPU.
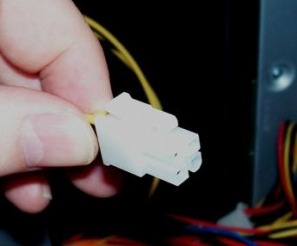 CPU Power Connector |
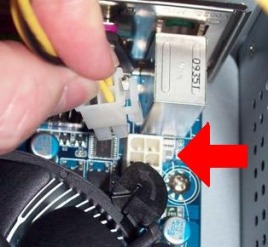 Plug into CPU Power Socket |
This particular cable can get caught in the CPU fan, one way of preventing this is by wrapping it around all the other PSU cables. This also helps keep other power cables neatly bound together, keeping them free from fans and assisting airflow
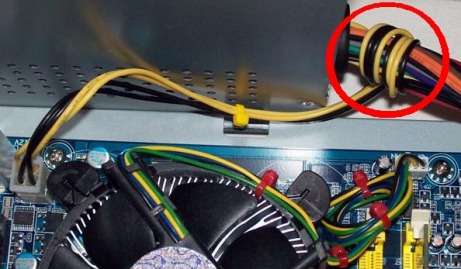
Use CPU Power Cable to Bundle Wires
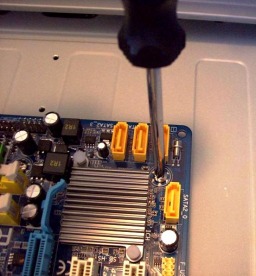
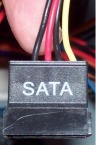
Now we connect the power cables for our drives, because we are using SATA drives we use SATA power connectors . They always connect on the left port on the drive as shown below.
|
 Connect SATA Power Cables on the Left Port Connect these power cables to both drives, any leftover will need to be bundled together.
|
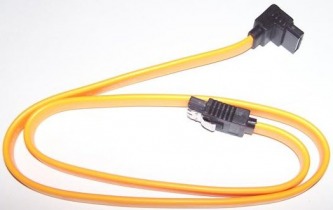
Next you will need to connect the SATA data cables, these connect your drives to the motherboard and transfer data to and from the computer. They are also keyed at both ends.
 SATA Data Cable |
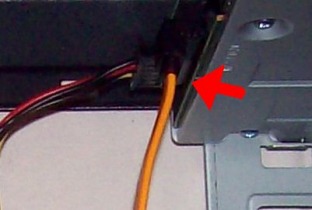 SATA Data Connected to DVD Drive |
Attach one end to the SATA ports on the motherboard, you may see a very small “SATA 1” and “SATA 2” next to these ports, the more ports you have the more numbers, usually you would connect the cable for the HDD at port 1 and the DVD drive at port 2. It is best to consult your motherboard manual about the correct setup and configuration.
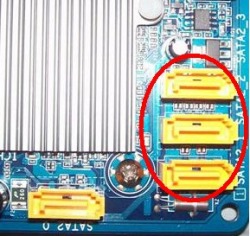 Motherboard SATA Ports |
 SATA Cables Connected |
The motherboard manual is the book that comes with your board, it contains all the information regarding the locations and specifications for wiring your system. They are written as a guide and you may find that depending on what case you have influences where certain wires need to plug in.
 Motherboard Manual |
 Case Wires |
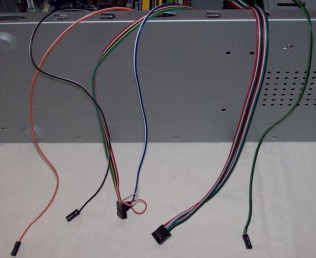
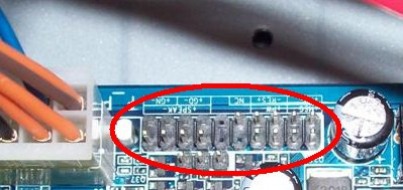
You have seen the power cables from the PSU that supply power, you may have also noticed that the case has its own set of wires. These wires are for adapting the case and its various components to the motherboard. Things like the flashing LED lights on the front of the case, and USB and audio cables, must be set so they can communicate with the motherboard.
Probably the most tedious of all to correctly wire and position, is the front panel pin assignments, they need to be set according to the Mobo manual, but not all cases have the exact same wires. This is the difficult part and you may require a torch and a steady hand. !
 Front Panel Pins |
If these pin assignments are not set correctly your computer may refuse to boot, you must have them set according to the specs in your Motherboard manual. |
The next wires are the USB and audio cables, these guys plug in at specific locations on the board, (consult manual). At one end they have a nine hole connector that attaches itself to its respective pinouts on the board. You must look at the connector to check its orientation before you install it, there is a sealed gap at one end that will bend a pin should you try and force it in. They may be a tight fit, so nudge them in gently without bending any pins.
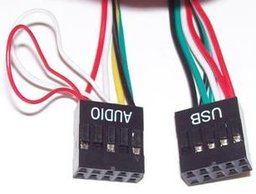 Audio and USB Connectors |
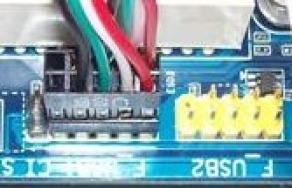 USB Connector Seated in Motherboard Socket |
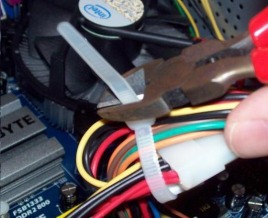
So now that we have the whole system wired up, we need to do some tidying, for this job we need our zip ties and cutters as shown below. After you have zipped-tied all loose wires, what you see on the right, is an ideal picture of what the inside of your case should look like.
 Cutters and Zip Ties Remember to cut off all excess tie and keep all cables well clear of cooling fans.
|
 Cables Zip-Tied and Secure |
The final Assembly
Once you have your case and wiring looking right, the next thing you need to do is plug in your peripherals (keyboard, mouse, screen, speakers etc) and test the system. Remember to also plug in the power cord at the rear of the computer and if your PSU has an “on/off” switch, check that it is on. Some older style PSU’s have a switch that is set to either 240Volt or
110Volt, (110v is US), these are called “switching PSU’s” and make sure it is set to your region.
Leave the side panels off at this stage just incase you need to adjust something, only replace them after you are satisfied everything is in working order.
110Volt, (110v is US), these are called “switching PSU’s” and make sure it is set to your region.
Leave the side panels off at this stage just incase you need to adjust something, only replace them after you are satisfied everything is in working order.
If you find after pressing the power button nothing happens, then you may have to troubleshoot some items as listed below.
· Check the front panel pins assignments are set correctly
· Check the 240Volt power cord is securely plugged in
· Try another power cord and power point
· Check that all cables and connectors are seated correctly
· Try another PSU, (it is rare but it may be DOA!!)
· Make sure the PSU is switched on and region set correctly
· Check the RAM is correct for your board and seated correctly
· Try and boot with only one RAM stick
· Replace RAM with new RAM
· You may also possibly have a faulty start switch on the case.
· If still no joy unplug all peripherals and then power up adding one at a time. (may detect faulty keyboard, etc)
Assuming you have success in powering up the system, the next thing you need to do is load on an operating system. This is what we call formatting, and Windows etc, gets loaded onto the HDD and creates partitions to install your data. To find out how to format a computer using Windows click: Formatting with Windows
Windows Disc for Formatting
Once your computer is formatted with your OS, you will now need to load on the drivers, these are programs that provide instruction code to your motherboard. Without drivers internet, sound, etc will not work. These are on the disc that came with your motherboard.

Driver Disc
Depending on what motherboard you have used, the installation process for drivers may differ a little, however most Mobo manufacturers offer the "auto-install" setup option. Obviously, if this is your first computer build, this is the option you should take.
When you finally have your OS and drivers installed your computer is finished, well done and now go and brag to your mates. !!
When you finally have your OS and drivers installed your computer is finished, well done and now go and brag to your mates. !!

What a Ledgend !!