Sending Photos with Hotmail

Hi Mum, my new ute!
We have all taken photos at some stage or another that we just can’t wait to share with friends and relatives, whether they care for them or not! All things being equal, it should be said that there is literally a myriad of ways to send your images and other paraphenalia across the internet. Such is the marvel of information technology!
This tutorial briefly describes one way using Hotmail. You can use different methods and some are a little faster, but for the most part, I will show you one very basic technique that applies not only to hotmail, but also many other email applications.
First things first, obviously to send photos you need to have access to them either via your portable media, (camera for example) or simply have them already on your computer. To find out how to put your photos on your computer, see:
Adding Photos to Your Computer
Adding Photos to Your Computer
Let’s say that you have them installed on your local drive and the folder storing them is the My Pictures folder. This is the default location for image files, keep in mind however, that if you are using some third party camera software, this location may have changed.
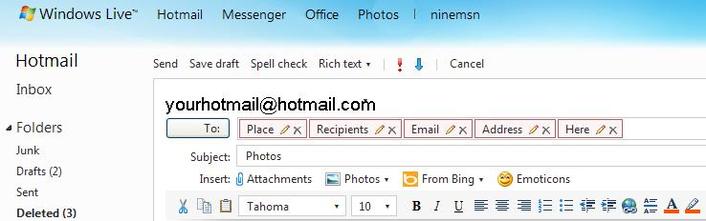
The first thing you need to do is open your hotmail and type in the recipient’s email address, no doubt being a hotmail user, you have done this part many times.
Follow these simple steps below to email photos using Hotmail.
Follow these simple steps below to email photos using Hotmail.
Step 1) Type in the receivers email address
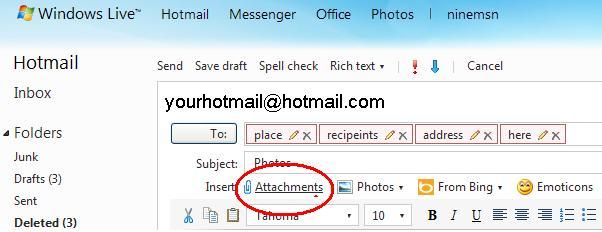
Step 2) Click Attachments
Step 3) Browse to the location of your image files.
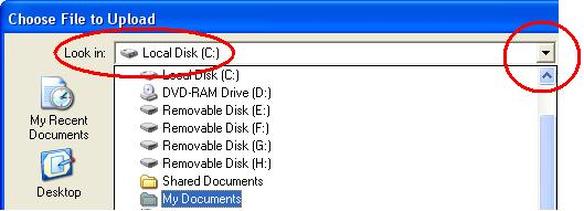
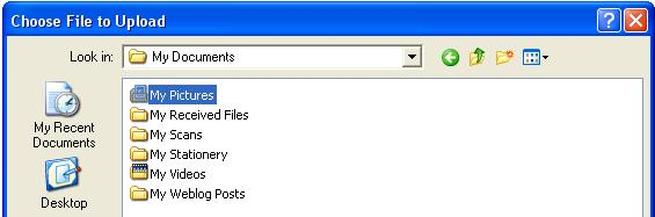
First click on the right down arrow, scroll the menu by clicking and holding the elevator at the right. Locate and double-click on the Local Disk (C:). Now click or scroll down the menu until you come across My Documents and again double-click.
This may be the hard part for beginners since many of us have our computers’ set up differently. As described previously, by default most of your photos or image files will reside in the My Pictures folder, this is located in the My Documents folder which you need to access first. If this is not the case on your system, you will need to browse and navigate your way to their location.
If you are not sure, and you are using Windows XP without any third party software, chances are, you may simply need to click where you see the items encircled in red.
If you are not sure, and you are using Windows XP without any third party software, chances are, you may simply need to click where you see the items encircled in red.
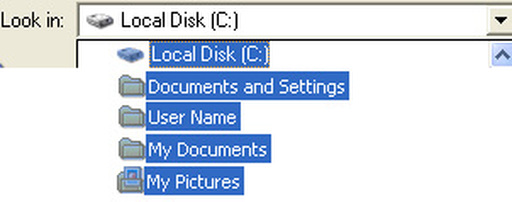
If this quick method does not work for you, then try navigating your way to the My Pictures folder by double-clicking on the listed items using the following pathway:
Local Disk (C:)
Documents and Settings
User Name (this will be your user account name)
My Documents
My Pictures
Local Disk (C:)
Documents and Settings
User Name (this will be your user account name)
My Documents
My Pictures
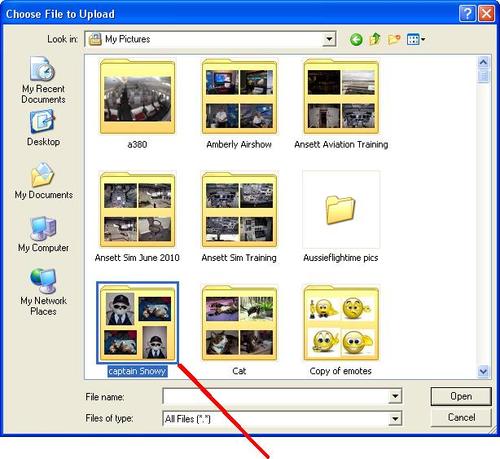
Step 4) Locate and double-click the My Pictures Folder
Step 5) locate and double-click the file containing the images you wish to send
Step 6) Click and select the image you want and then click Open, or just double-click!
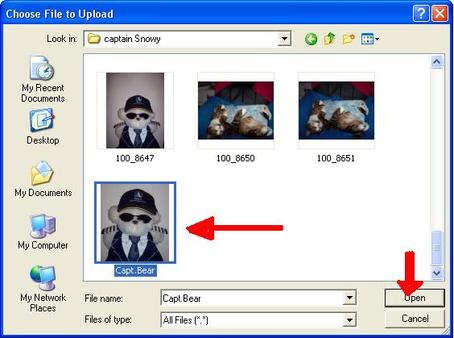
Hotmail will now take a moment to upload your image file to the server, after this process is complete, you may add other photos or send the one you have attached. The upload limit is usually around 10 megabytes, anything larger will require separate emails to be sent. Generally speaking, it is best to "compress" your photos before send them, this way you can send multiple photos at once.
Step 7) Click Send
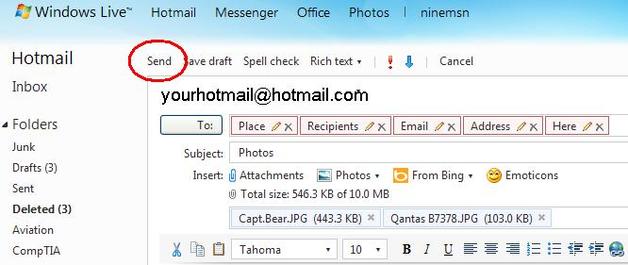
So there you have it, a very basic way of sending your photos via hotmail, there are of course various other ways of achieving the same thing but, my goal here is to keep things as simple as possible. And don't forget to type your message in the email.
This process can also be used for other files such as documents, media files or practically any other attachments that you may wish to send. One thing that you will find, especially with the developing technology of digital cameras and the like, is the larger file sizes that come with your photos from the latest digital media devices.
You may have heard the term “megapixels,” and this reflects the size and quality of an image file, basically as this size increases, so does the sharpness and quality of your photos.
The drawback is however, that they soon become so large that sending them over the internet takes a very long time and also chews up considerable bandwidth. So for those with restricted download and upload limits and a slow internet, this will inevitably become an extremely frustrating experience.
They best way around this is to resize your images before you send them. We call this file compression. How is this done you ask? That will be my next tutorial!

Stay Tuned Y'all!!