System Restore

Virtual Time Machine
System restore works by creating what are known as “restore points” which basically become points marked in time on the computers calendar. It is a virtual time machine for your computer. The idea behind this is to enable the user to simply “restore” the computer to a previous state should the need arise. It is a handy little tool especially in the case of system crashes, registry corruptions, faulty drivers, program failures etc.
System restore automatically creates these restore points that are essentially “time stamps” (time and date snapshots) which record the setup and configuration information of the computer at an allocated point in time. It also keeps a record of files and programs that are installed at the same time. To manually create a Restore Point see Creating a Restore Point
While in some cases with virus infections you might be able to restore the computer back in time to a state before the virus was present, this is the lazy way out and does not always prove successful. System restore also keeps your personal files in tacked so you will not loose them after a restore operation, usually only those files or programs which you have either deleted or recently installed may not appear present after a restore. If you are not happy with your new restore point you can also undo a restoration or simply choose another point. You also need to ensure that System Restore is not turned off and is enabled.
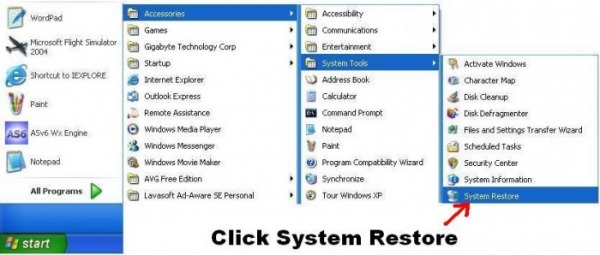
To use System Restore click the following:
1) Click Start
2) Click All Programs
3) Click Accessories
4) Click System Tools
5) Click System Restore
1) Click Start
2) Click All Programs
3) Click Accessories
4) Click System Tools
5) Click System Restore
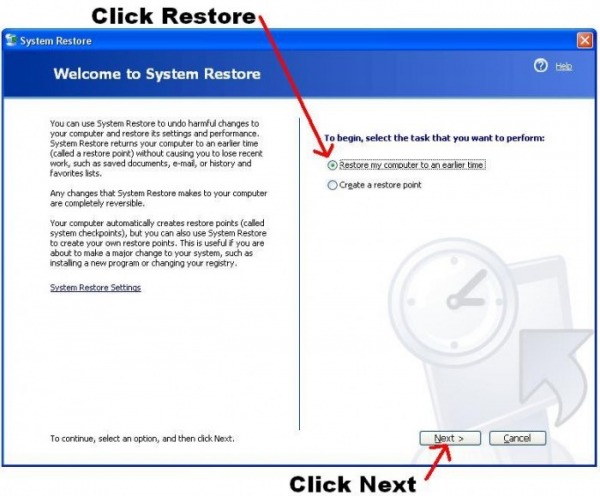
6) Click Restore my computer to an earlier time
7) Click Next
7) Click Next
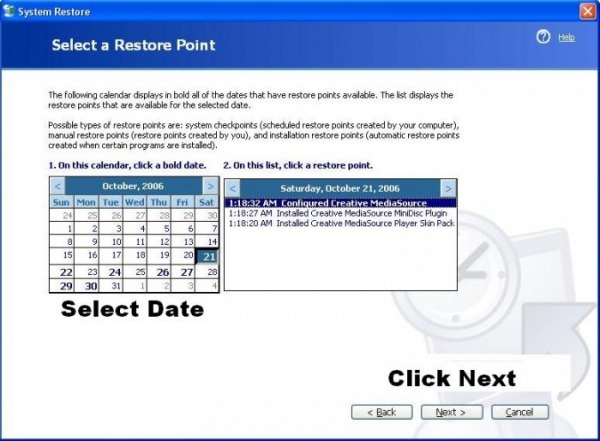
8) Click on a date to select your restore point then click Next
9) System restore will now identify your selected restore point, now click Next
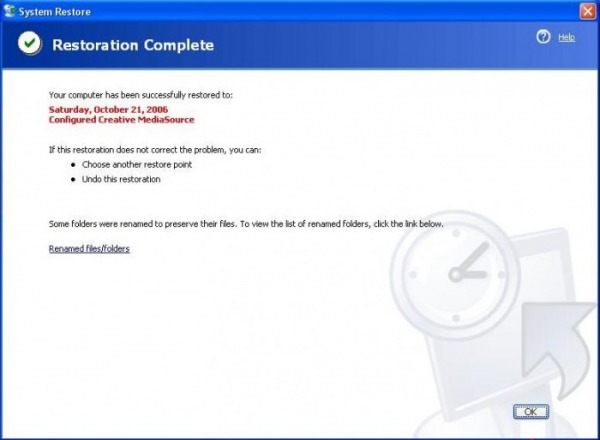
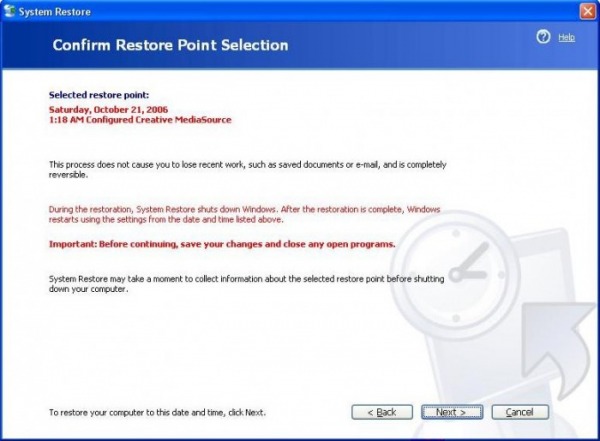
10) Your computer will reboot and afterwards click OK and your done. !!

Mum I fixed it !!